AI for Small Business
How Sync Business Scale Simplifies Small Business Operations
October 6, 20263 min

Discover how to create a powerful email campaign using SimplySync AI. Learn the steps, best practices, and when to use this tool to connect with your audience and grow your
Email campaigns are one of the most effective tools for small businesses to reach their audience, build relationships, and drive action. Whether you're launching a new product, sharing updates, or nurturing customer loyalty, a well-crafted email can make all the difference. With SimplySync AI, you can streamline the process and create professional, engaging emails that speak directly to your audience.
Creating an email campaign in SimplySync AI is designed to be intuitive and efficient. The platform offers a variety of customizable email templates, making it easy to get started without needing advanced design skills. SimplySync AI also integrates features like Email AI, which can assist with drafting and editing your messages, ensuring your content is clear, professional, and aligned with your brand.
Follow these steps to create and send an email campaign using SimplySync AI:
Use this guide when you're ready to create an email campaign to engage your audience. Whether you're launching a new service, sharing an update, or running a promotional offer, this process helps you deliver professional, targeted messages efficiently. It’s especially useful for small businesses that need to maintain regular communication with their customers without the need for complex tools or design expertise.
Some common mistakes to avoid include skipping the final review before sending, using real customer data for testing, or not testing your email before sending it to your entire list. Taking the time to review and test your email ensures that it looks great and works as intended.
If you run into any issues or have questions, contact SimplySync Support for assistance. They're here to help you through any challenges and ensure you get the most out of the platform.
Use these SimplySync resources when you want the next step.
Use these screenshots as a visual reference while you follow the guide. They are included inside the post for context, while the main blog image stays SimplySync-owned category art.
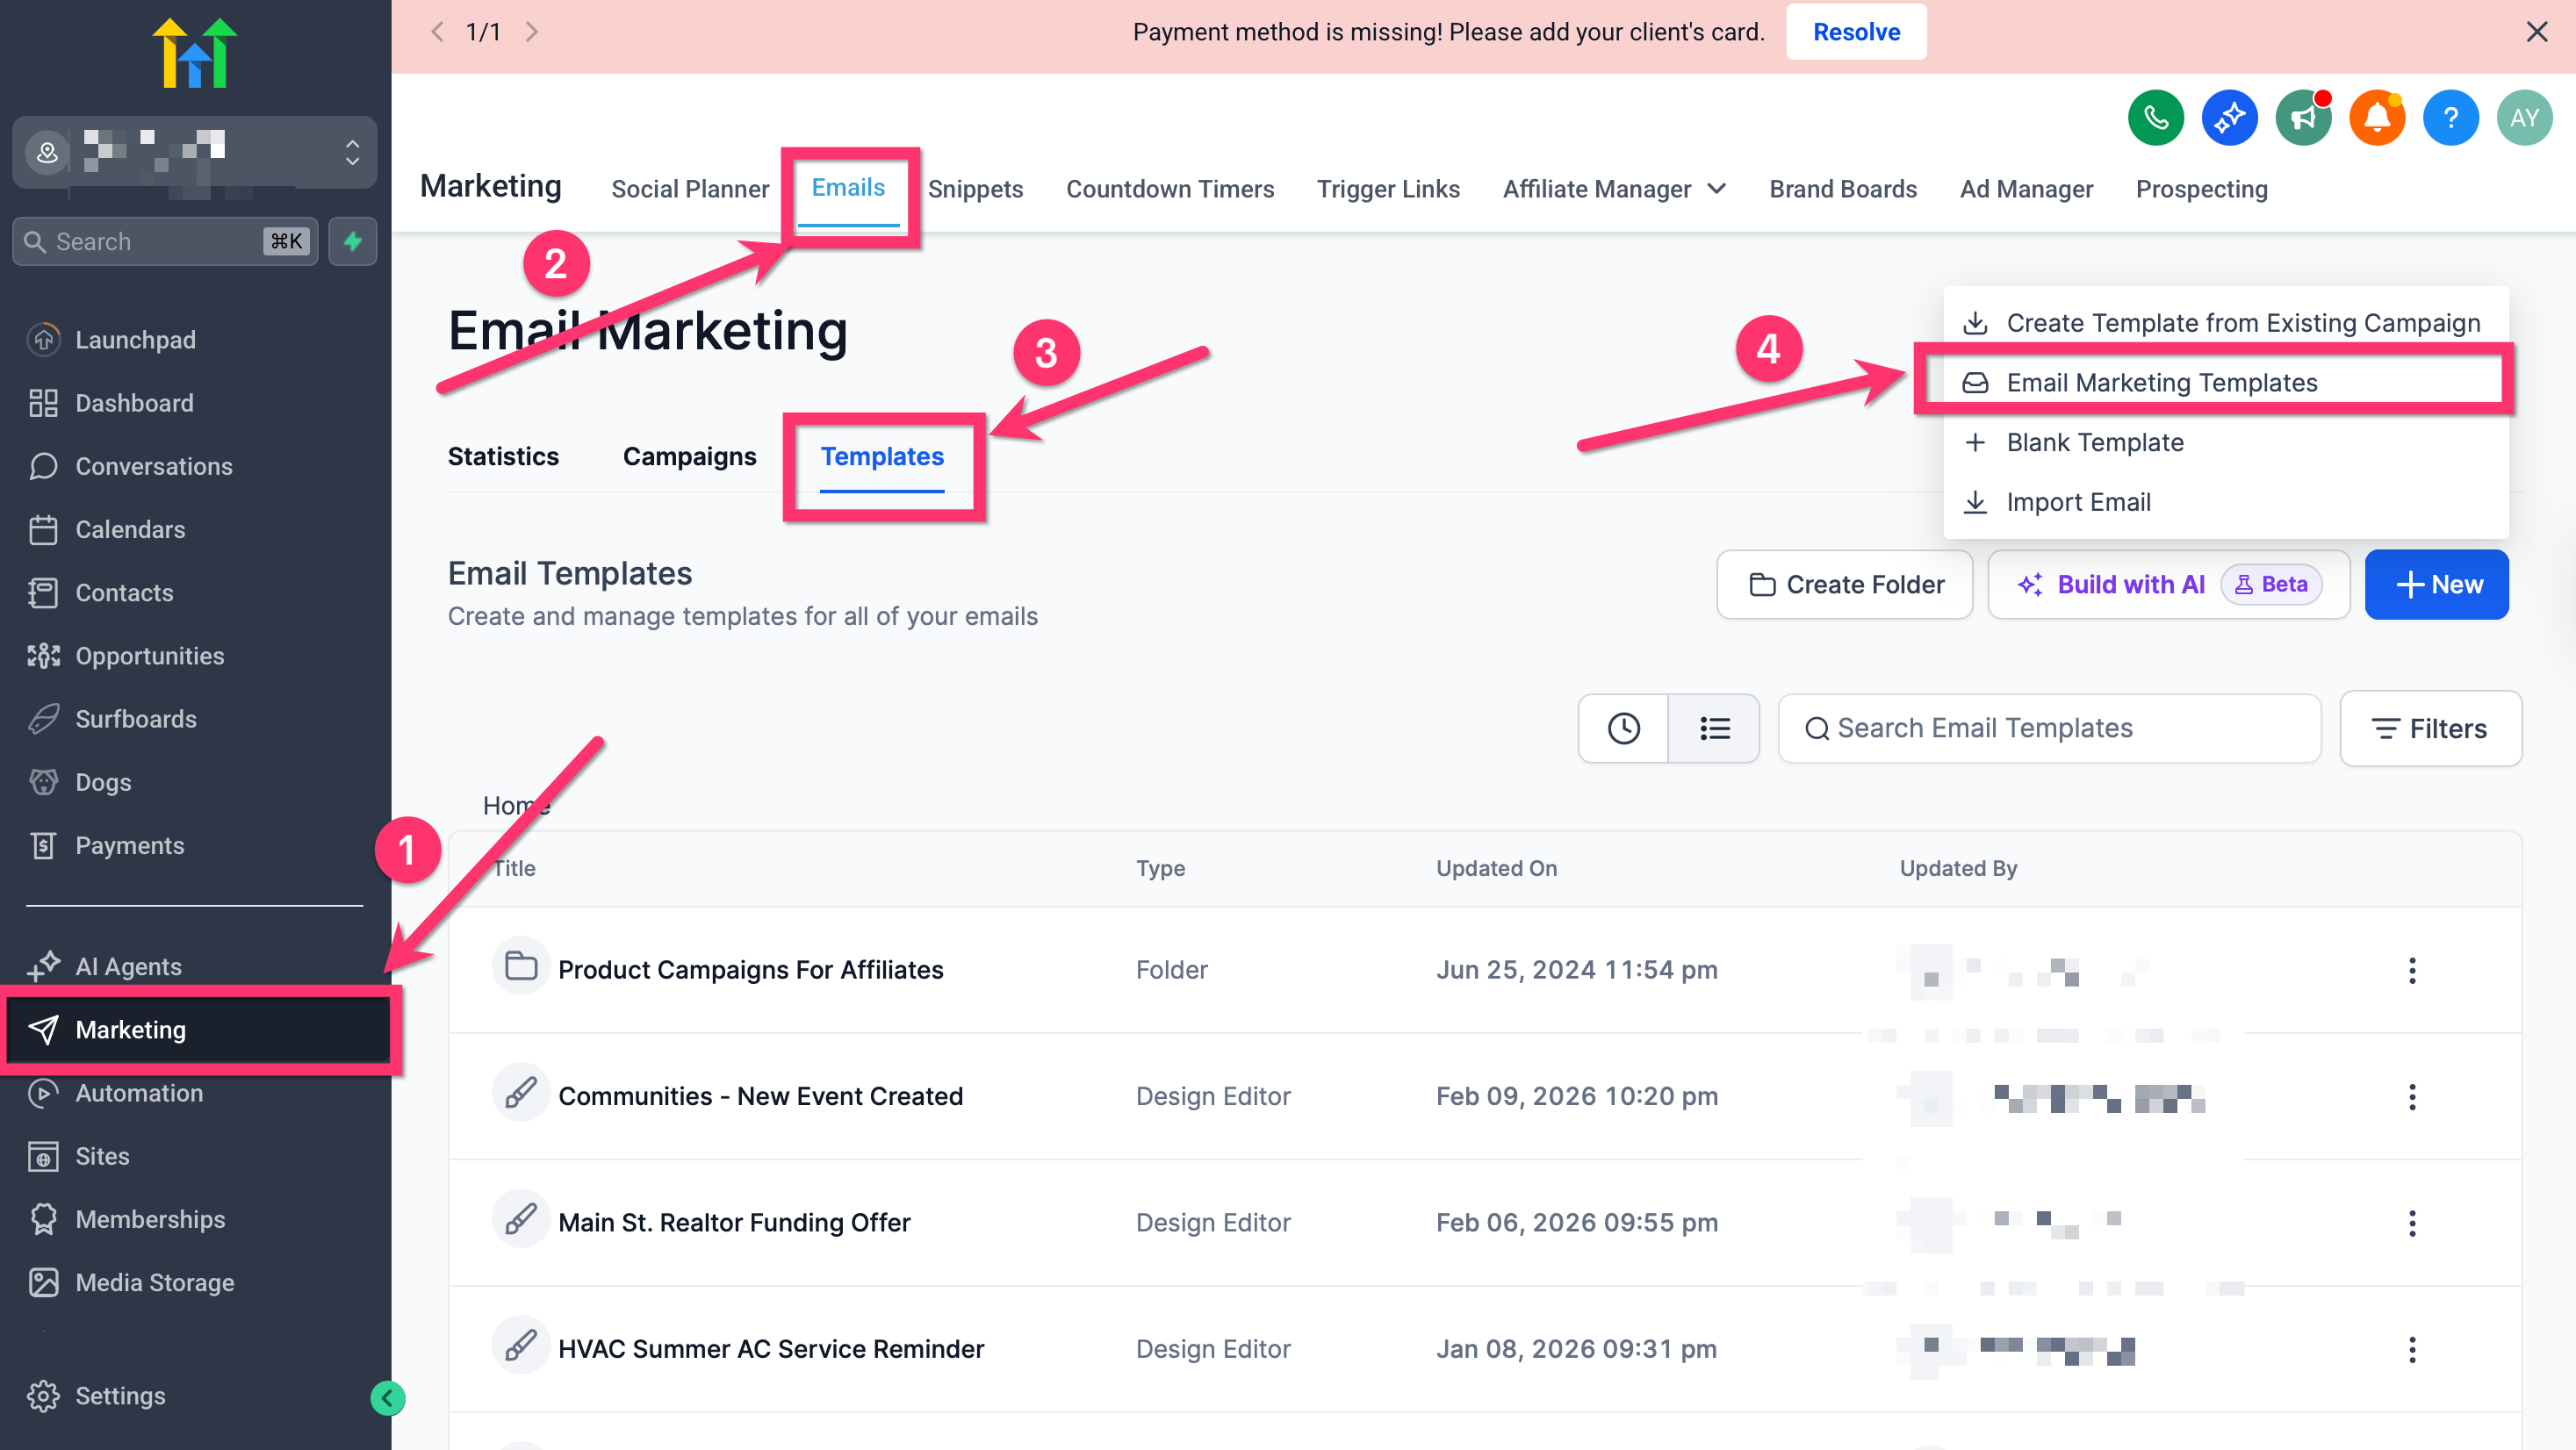
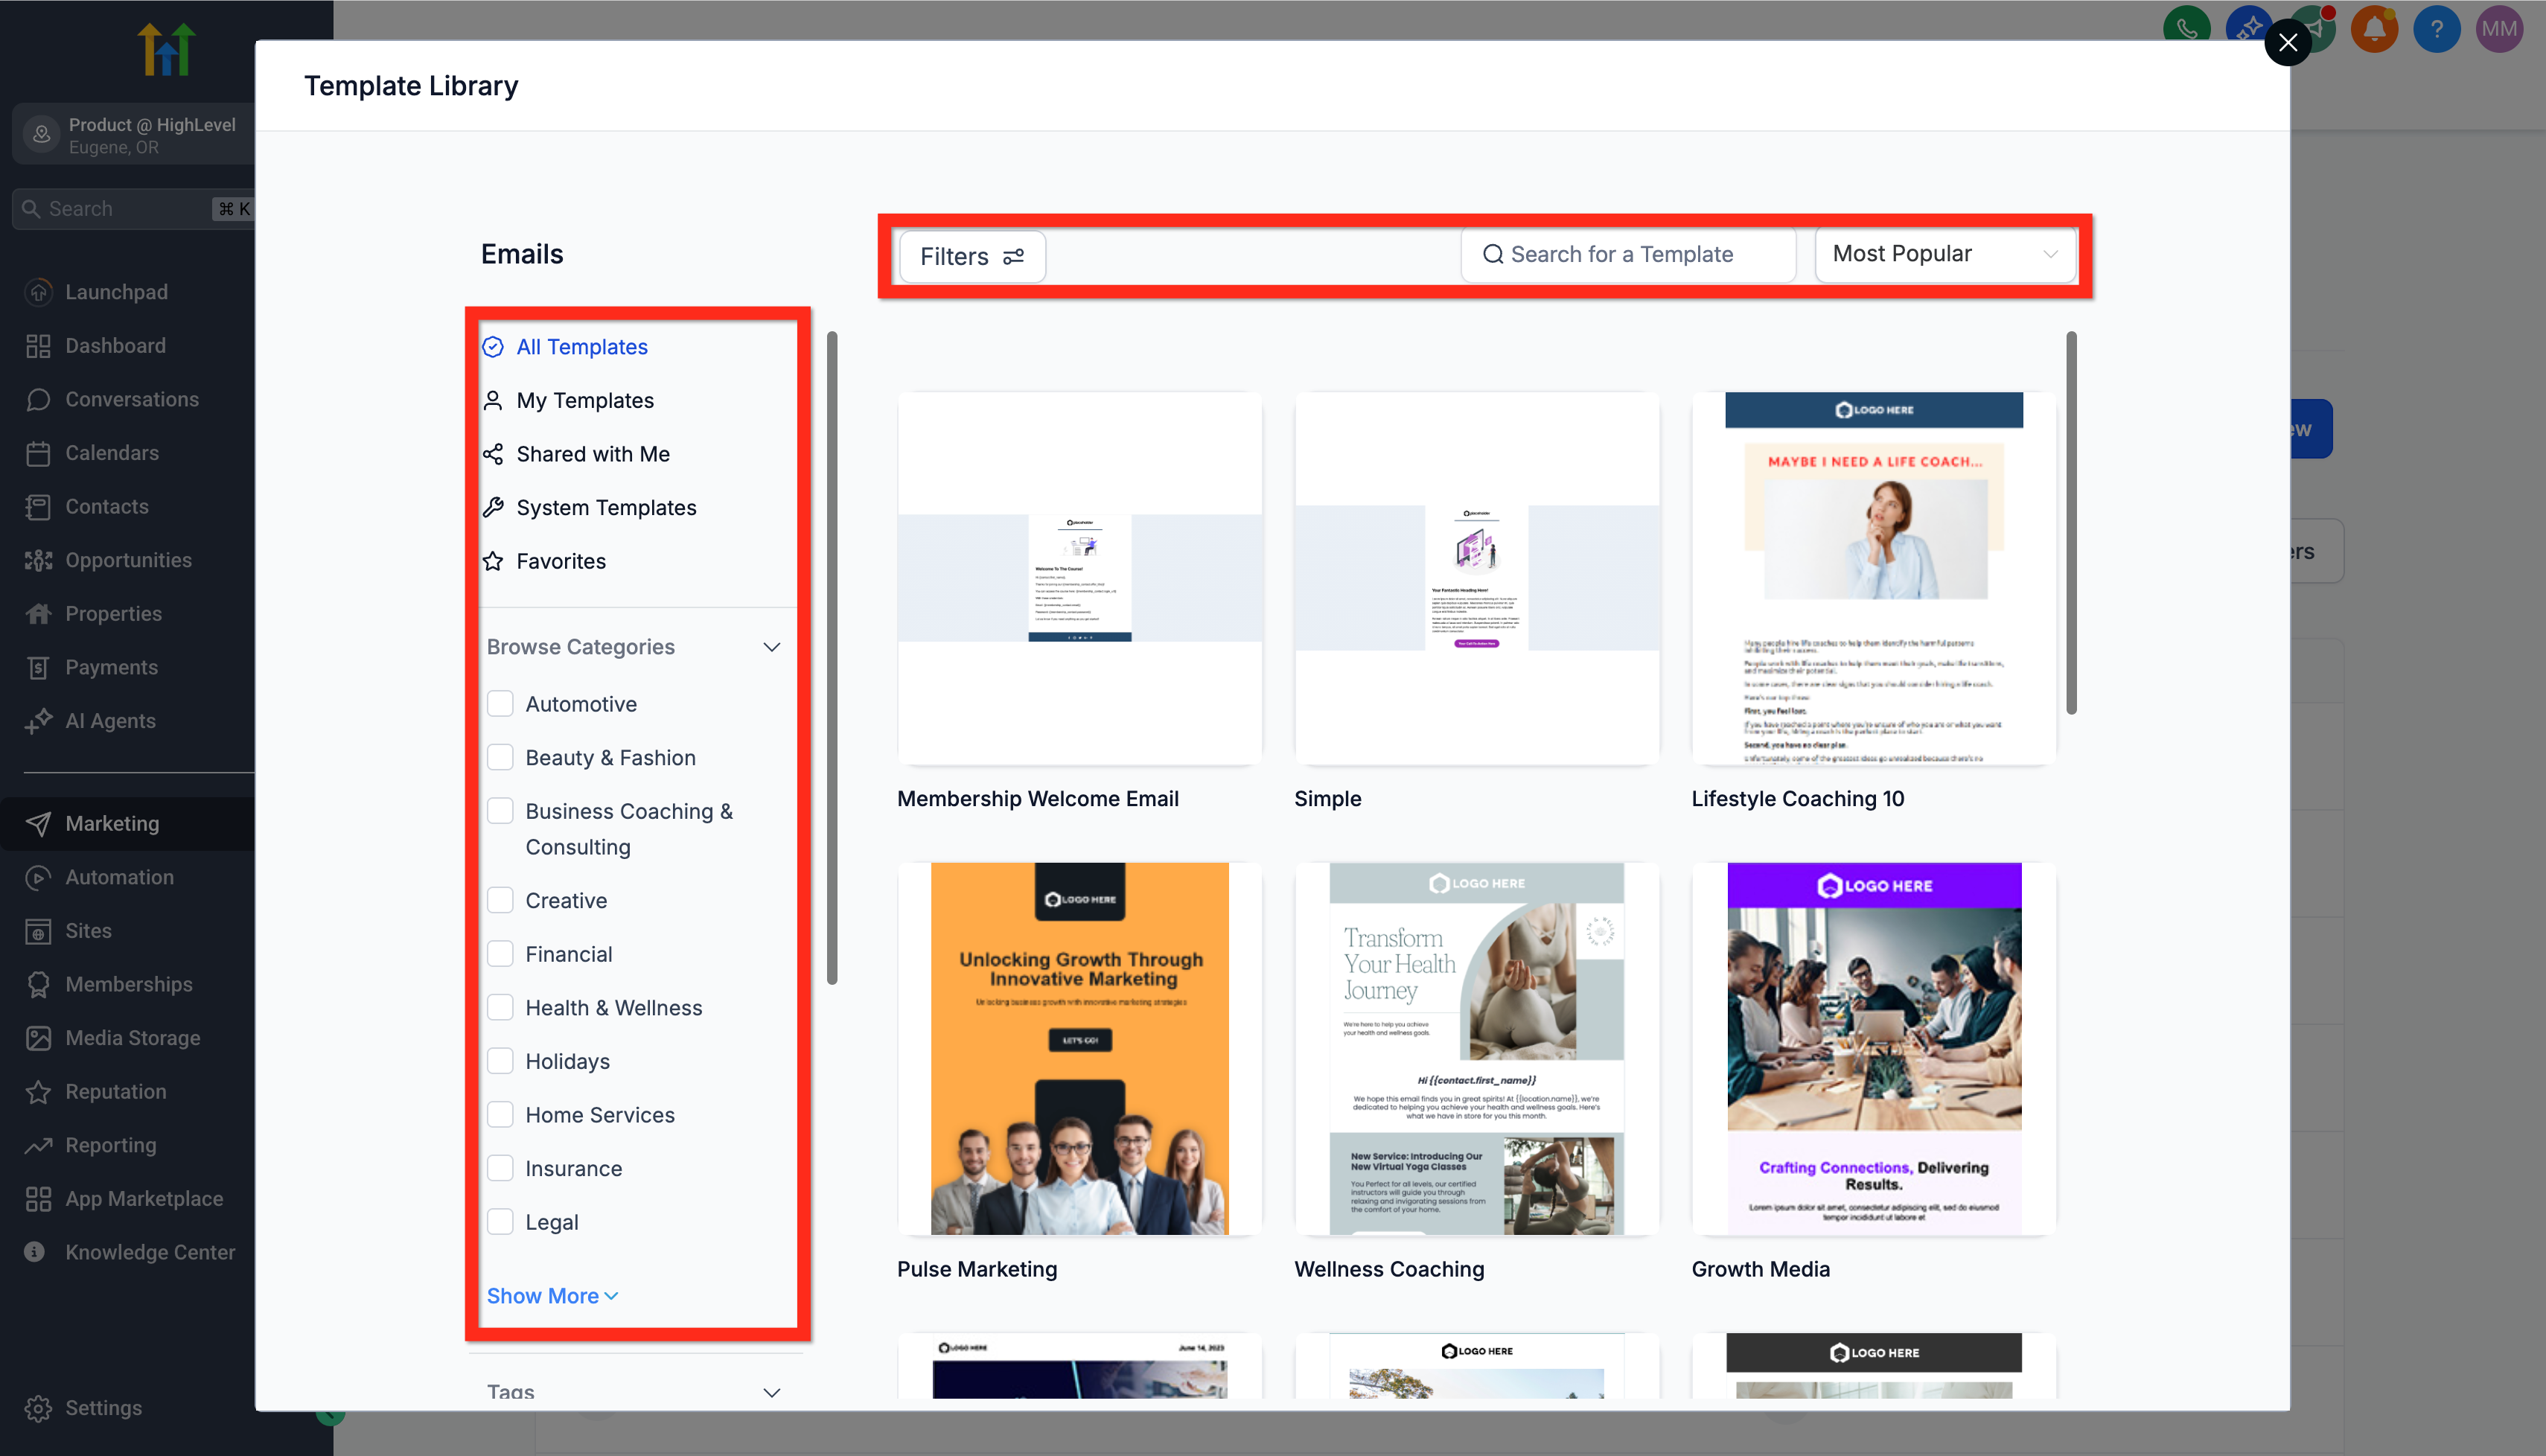
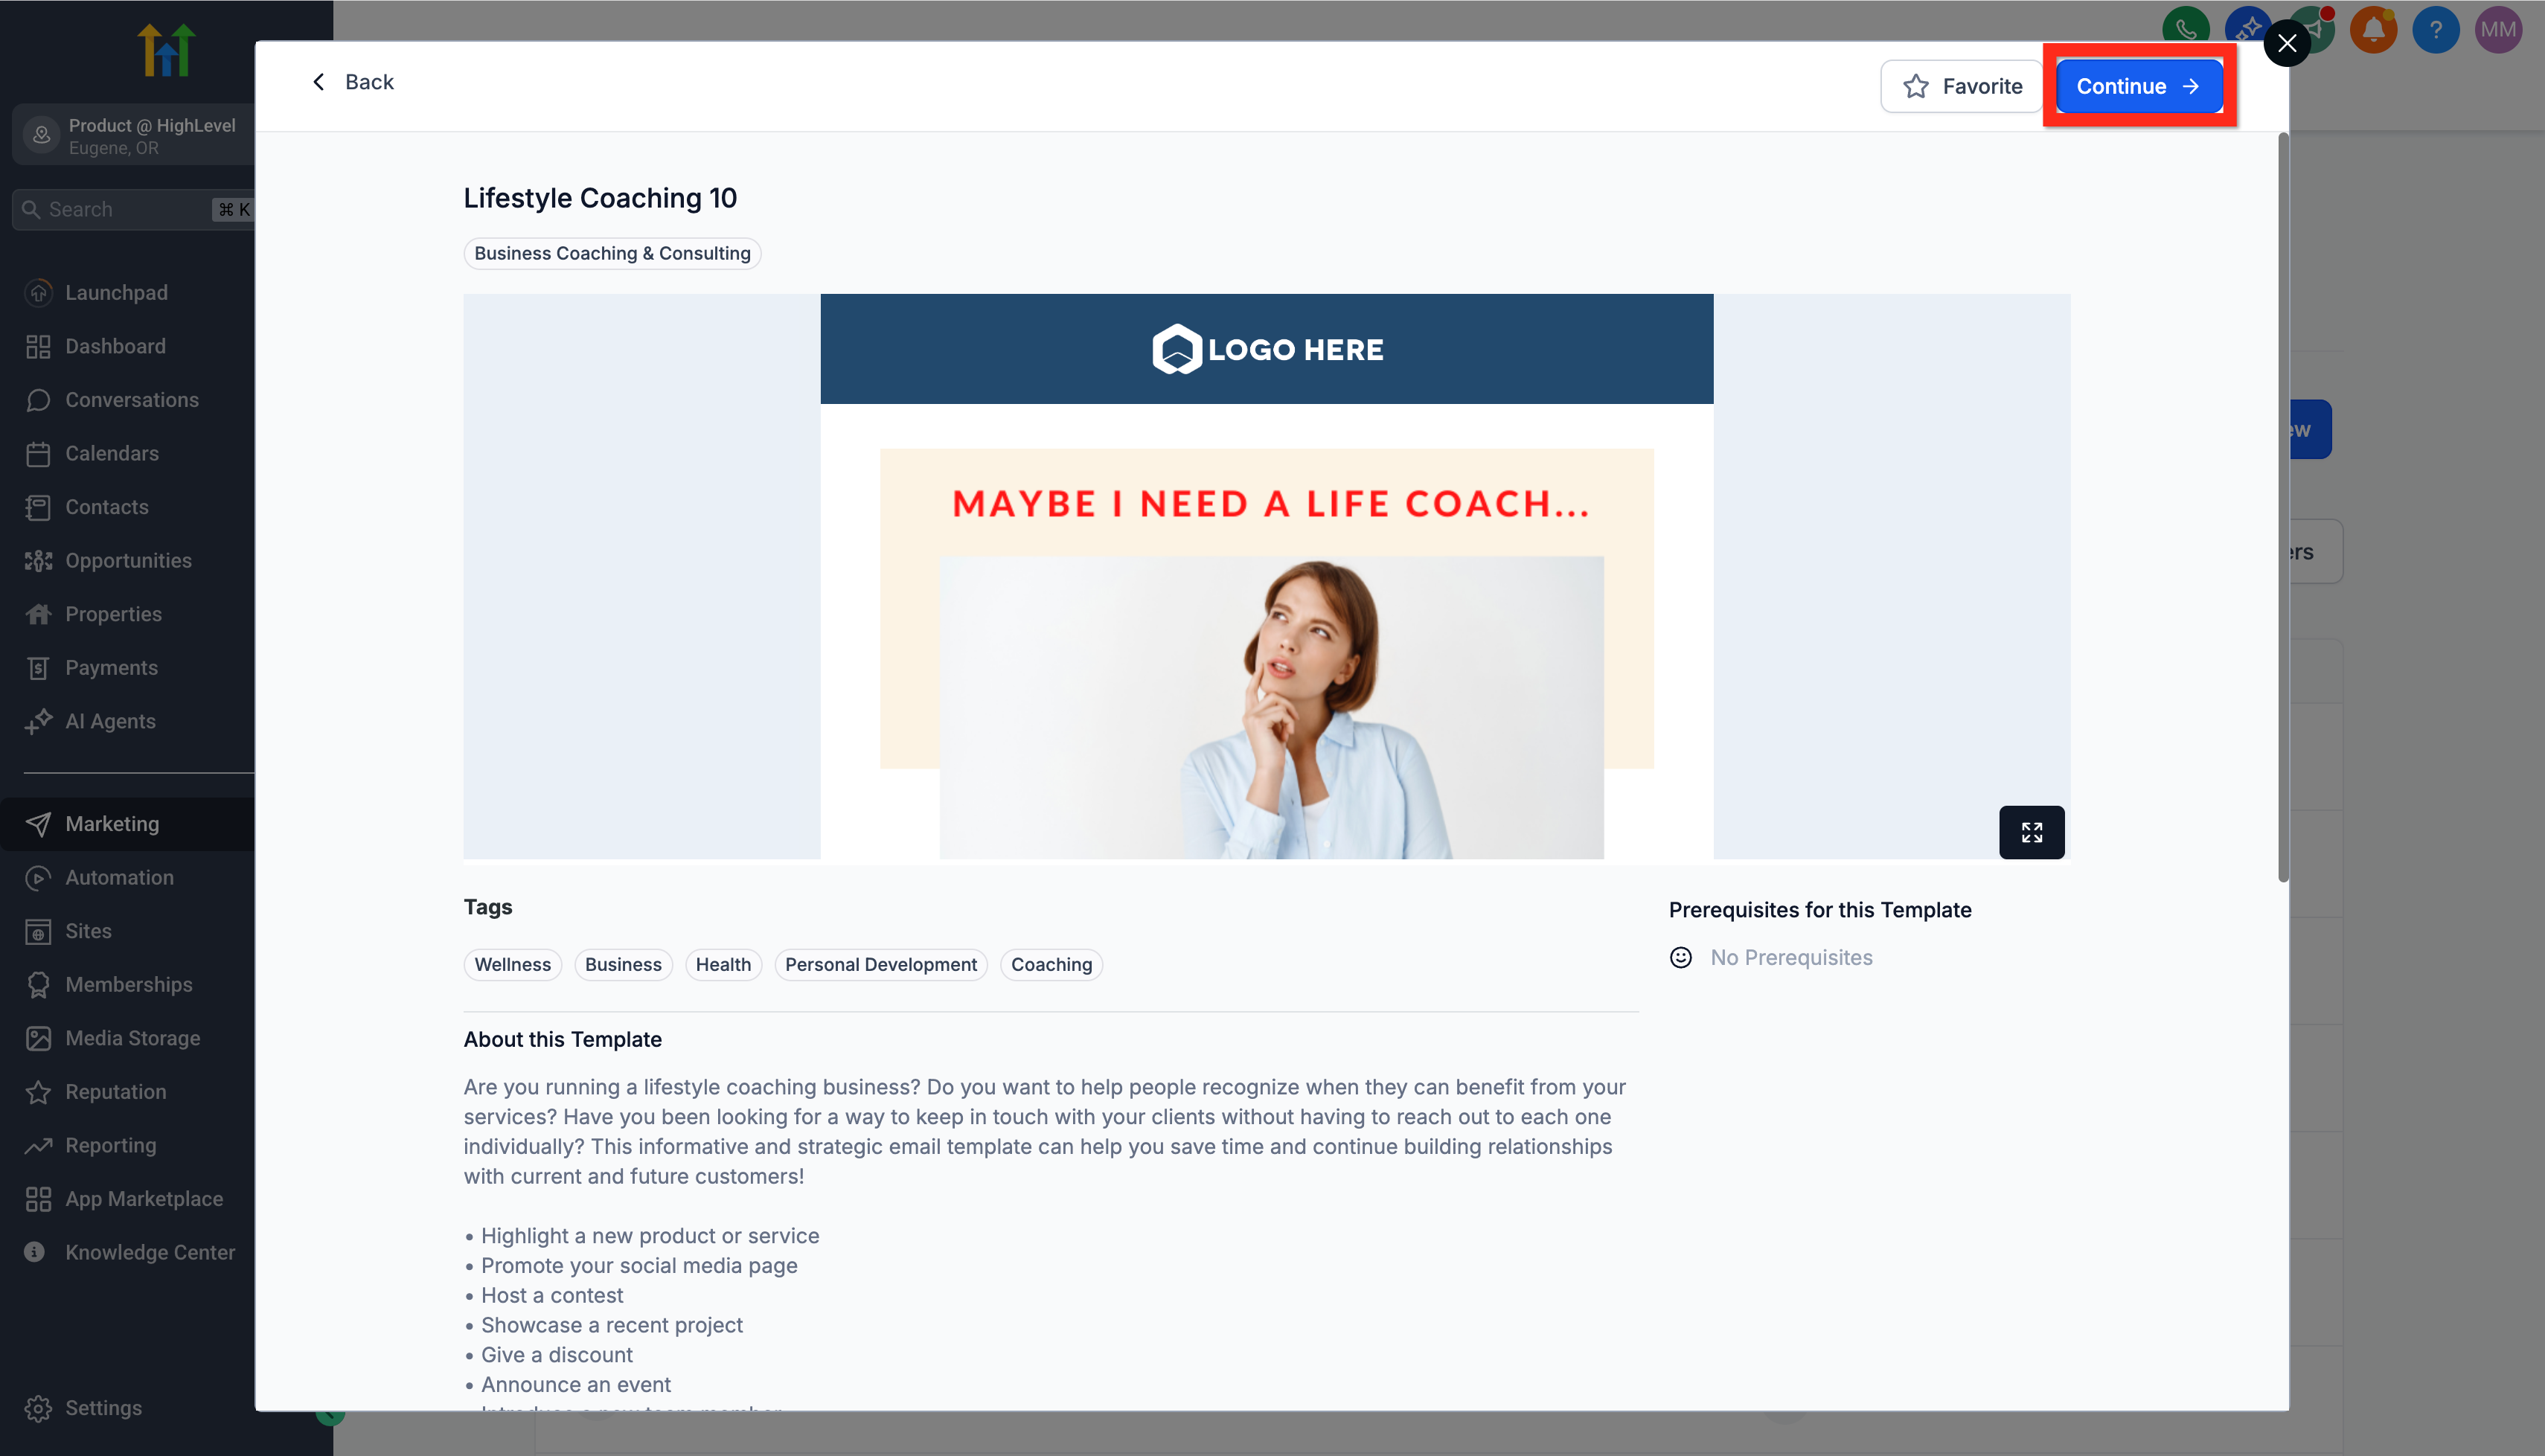
Photo by Ono Kosuki on Pexels.
Tagged

Founder of SimplySync AI. Dylan designs, builds, and maintains the AI systems, automations, and websites SimplySync ships for local businesses, and writes or reviews every article here.
Join local business owners getting weekly AI automation tips, case studies, and strategies you can actually use.
No spam. Unsubscribe anytime.
SimplySync connects your website, CRM, and follow-up into one system, with AI that responds to every lead 24/7 and books appointments while you focus on your work.